Dobot and Robot Operating System
Pubblicato il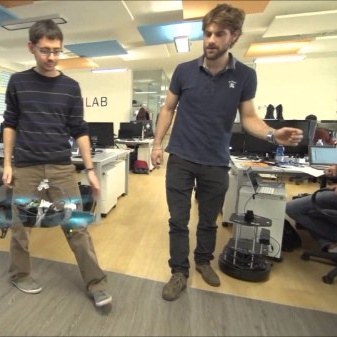
Gabriele Ermacora
Imprenditore
Hi! In this (first) tutorial I want to explain you how to setup ROS in Dobot robotic arm and writing an easy application for drawing. A special thanks goes to Alumotion, italian distributor of Dobot, for gaving us this incredible robotics arm for free!
First let’s see roughly what is Dobot and why I fancy it so much.

Dobot
Dobot is a multi-functional robotic arm produced by the Chinese company Shenzhen Yuejiang Technology Co. The company was founded in 2015 after a successful Kickstarter campaign where they gained more than 650 thousand of dollars. At the moment they launched already 6 robotic arm in the market.
Dobot is an educational product designed for many differ people: from total non-experts who wants to learn coding to skilled programmers. Dobot is very easy and when you buy it you just have to program it with no previous assembly phase or configuration. In addition there are many tools that offer so many different functionalities to the robot. Among the coolest there are: drawing, laser craving, 3d printing, manipulation of small objects. You can program it with Blockly (similar to Scratch but open source), in Python… and now in ROS too thanks to this terrific tutorial!
All of this at an unbeatable price (around 1500 Euro). More info here. I think it’s a fun robot and you can do many things (quite precisely too) in a very easy way, on the contrary I have to say that the open source community is quite bad managed (unfortunately:( ) especially when it comes to have a look at the documentation and drivers in Linux.
ROS e Dobot: let’s go!
You need:
- an Ubuntu distro with ROS installed (I use Kinetic on a VirtualBox Ubuntu on a Mac OS)
- a Dobot robotic arm! ;)
Now let’s test if the robot communicates correctly with the computer via USB. Open a terminal e check all the devices connected typing lsusb and ls /dev/tty*.

Plug in the Dobot USB cable into your computer (Dobot switched on). Typing the same instructions as before and you should now see QinHeng Electronics HL-340 USB-Serial adapter and a new device plugged in. In my case is /dev/ttyUSB0.

Now let’s install cutecom typing sudo apt-get install cutecom for testing the protocol. Run sudo cutecom.
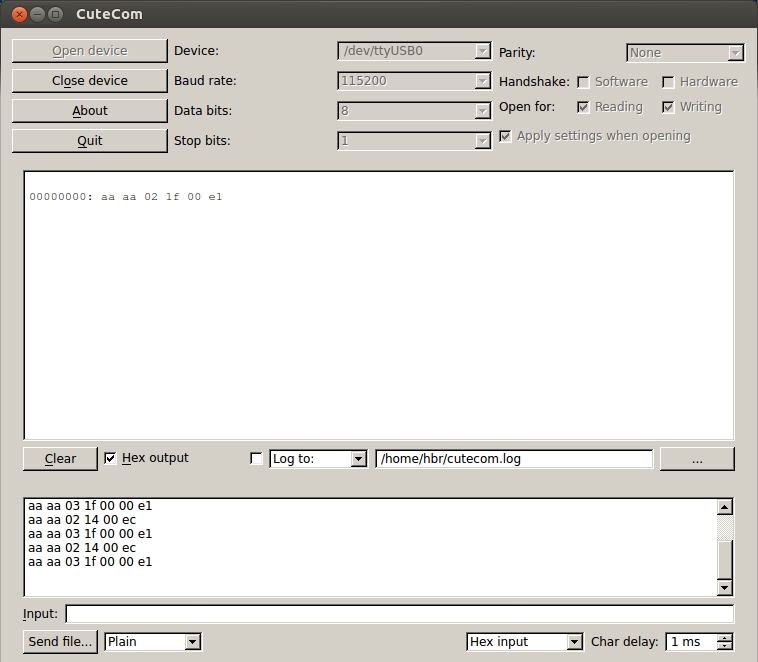
Set in “device” the correct USB device (for me it’s /dev/ttyUSB0) flag “Hex Output” and select in the bottom menu “Hex Input”. Now press “Open Device”, if you have problems try sudo chmod 777 /dev/ttyUSB0 .
Now type in “input” aa aa 02 14 00 ec it should answer with a string. Now type aa aa 03 1f 00 00 e1 and you should see Dobot moving!
Now we are ready to use ROS for real!
Download the ROS package for Dobot Magician from my personal github. You can use the [official package] (https://www.dobot.cc/downloadcenter/dobot-magician.html?sub_cat=72#sub-download) of course but here I just added two scripts for the application and it would take probably less time to download ;)
Create a new catkin workspace (or add it in an old one) as explained here. Copy my ros-dobot package in catkin/src and compile with catkin_make
When everything finish with no error start the roscore in a new terminal.
roscore
In another one (setting the correct device in the code too, in my case /dev/ttyUSB0)
rosrun dobot DobotServer /dev/ttyUSB0
In anothe one the node I wrote
rosrun dobot DobotClient_topic
and in the end again in another terminal. This is just the node that publish the position that Dobot has to follow.
rosrun dobot talker
And we’ll get this final result!
Gabriele Ermacora
Imprenditore